
This Blog wants to present a review of the Maxim TINI m390 board. The TINI board is a small embedded processor with various IO that is best suited for standalone embedded application. It is not the only one on the market but it is one with many good points.
If you want further info on the board you can browse the official Maxim web
The TINI most interesting feature is that it runs java but does not stop you to dig up 'c'. Together with two serial , can bus, etherenet, and the one-wire ti has quite a lot of connettivity. Clearly if you are using a few thousand of them you may consider building your own, othervise it is a good choice. The full specification are available.
The TINI module is quite small 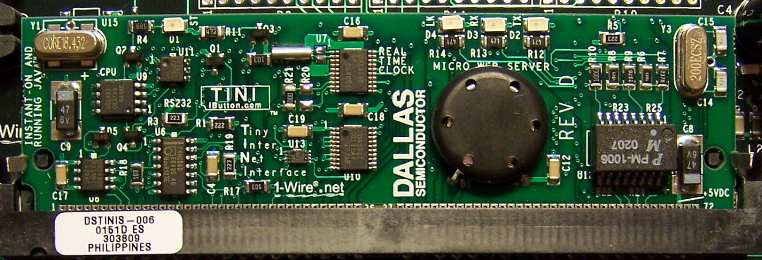 and uses as connector a standard 72 pin connector.
The evaluation board
and uses as connector a standard 72 pin connector.
The evaluation board 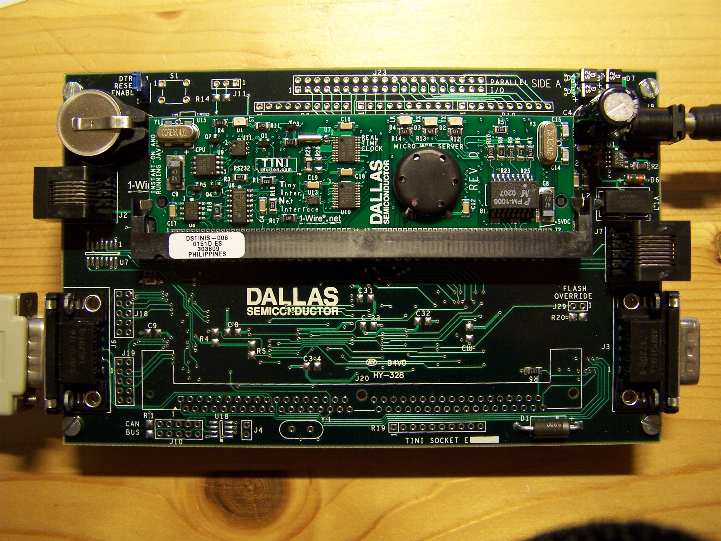 is much bigger and offers all the output that one may wish.
This demo board is quite relaxed about the power supply and so basically any low voltage PSU will do, I used a 12v
adapter I had around but you can plug from 8 to 24 v in AC or DC mode
You then have to connect it to a computer using a serial cable, you probably have to use a
USB to serial adapter like this one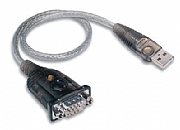 The serial cable is a straight trough and should be fine.
The next step is to install Java on your system, remembar to install the JDK and then you download the development kit for the TINI platform (from the official website above). I downloaded the version tini1_02h
The board is controlled using a java application called JavaKit, you can find it in the bin directory of the development kit and of course you need to install the serial suport for java. This can be triky since it is not always clear what is happening.
With the demoboard powered up, the serial cable connected, java installed, javacomm installed you should need only a simple script to run the console.
java -classpath tini.jar JavaKit
The result should be a terminal window, you have to set the correct port, open it and then try to reset the board,
if all is well you should get a window like this one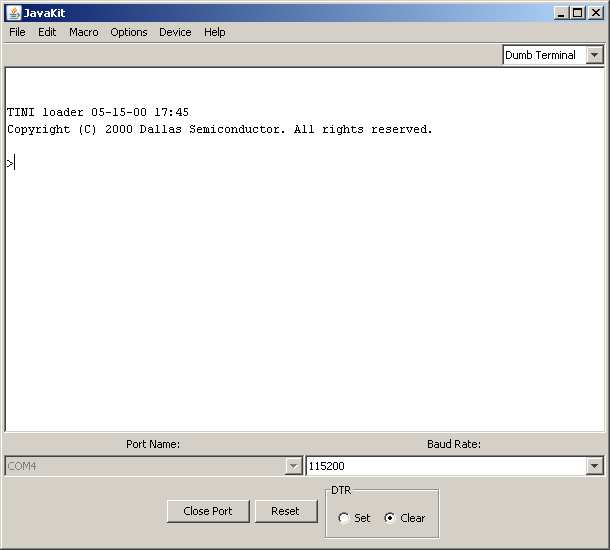 Next you have to load slush.tbin and tini.tbin, clear the ram typing BANK 18(CR) FILL 0(CR) and then EXIT(CR).
You can find more info about this on the main manual above.
Next you have to load slush.tbin and tini.tbin, clear the ram typing BANK 18(CR) FILL 0(CR) and then EXIT(CR).
You can find more info about this on the main manual above.
After a few boot messages you have a login prompt you can access the system using root and password tini
You can find the available commands using help
The next step is to configure the network, this is easly done using the ipconfig command. Of course your network configuration may be different, but this is what works for me.
ipconfig -a 10.0.0.10 -m 255.0.0.0 -g 10.0.0.2 -p 10.0.0.2
ipconfig -C
So far we have just started the system, it is now time to load some application. The first and simplest one is the Blinky one in the examples directory. This time you have to have the javac in your path and this may mean changing in the Windows or Linux configuration, once you can type javac and have it run you can run the compilation of the example. You have to produce java 1.1 executable and therefore this is the correct bat
@echo off
REM Compile the classfile
javac -source 1.3 -O -target 1.1 -bootclasspath ..\..\bin\tiniclasses.jar -d bin src\*.java

REM Run it through TINIConvertor to make it ready to run on TINI
java -classpath ..\..\bin\tini.jar;%classpath% TINIConvertor -f bin\Blinky.class -o bin\Blinky.tini -d ..\..\bin\tini.db
Time to upload the application to the embedded using FTP
ftp 10.0.0.10
Connesso a 10.0.0.10.
220 Welcome to slush.  (Version 1.02h)  Ready for user login.
Utente (10.0.0.10:(none)): root
331 Password Required for root
Password:
230 User root logged in.
ftp> bin
200 Type set to Binary
ftp> put Blinky.tini
200 Command successful.
150 BINARY connection open, putting Blinky.tini
226 Closing data connection.
ftp: 220 byte inviati in 0,00secondi 220000,00Kbyte/sec)
And run it using java
java Blinky.tini &
The best example is a temperature monitor web server. You have to have a OneWire temperature monitor to run it and you have to follow the instructions. It works basically out of the box once downloaded. The procedures to build and upload it are the same as the previous example.
I managed to have it go trough firewalls and you can reach it at the following address
http://www.tonezza.it:90
Try it !
For all of you curioous, this is a snippet to get the temperature from a OneWire network. I think that is quite simple and I like the fact that Java protects me from the common buffer overflow, lost pointers that bugs down development time.
import com.dalsemi.onewire.OneWireException;
import com.dalsemi.onewire.adapter.*;
import com.dalsemi.onewire.container.*;

public class TemperatureWorker implements Runnable
  {
  private static final String classname="TemperatureWorker.";
  private double currentTemperature = Integer.MIN_VALUE;
  private TINIExternalAdapter adapter;
  private OneWireContainer10 tempSensor;

  public TemperatureWorker ()
    {
    adapter = new TINIExternalAdapter ();
    }

  public String getCelsiousString ()
    {
    if ( tempSensor == null )  return "NOT FOUND";

    return currentTemperature+"C ";
    }

  /**
   * Run the Temperature server thread
   */
  public void run ()
    {
    for (;;)
      {
      try
        {
        doWork();
        // Sleep for one second, no need to rush.
        Thread.currentThread().sleep(1000);
        }
      catch ( Exception exc )
        {
        System.out.println ("TemperatureWorker.Exception="+exc);
        }
      }
    }

  private void doWork () throws OneWireIOException, OneWireException
    {
    if (tempSensor == null)
      {
      adapter.targetFamily (0x10);
      tempSensor = (OneWireContainer10) adapter.getFirstDeviceContainer ();
      return;
      }

    // Here the sensor is not null, it must be...
    if (!tempSensor.isPresent ())
      {
      System.out.println(classname+"sensor is not present");
      tempSensor = null;
      return;
      }

    // here the sensor is present and good
    byte[] state = tempSensor.readDevice ();
    tempSensor.doTemperatureConvert(state);
    state = tempSensor.readDevice ();
    currentTemperature = tempSensor.getTemperature (state);
    }

  }
The default web server is nice but I wanted to be able to generate real dynamic content, so I managed to enable a servlet behaviour in the HTTP server and now the temperature result is created right when someone request the page. Email me if you want further info. (look at the home page for Email information)
Creating a simple controller with the TINI board is easy and fast, if you have to make just a few controllers this board may be the right one for you.